Six tips to make your photos pop

Sometimes taking a photo indoors results in a yellowish tint. Or on cloudy days, things can look too cold and unnaturally blue. We often turn to editing tools to correct these off tones, but don't always have the time or expertise to white balance our photos.
Now, when you open the photo editor in Google Photos and select a look, we’ll not only correct exposure and saturation, we'll also automatically correct the white balance in the image. And if you want to tweak it even more, just go into Color and adjust the Warmth and Tint.


Auto white balance in looks are rolling out this week on Android and web, and soon we’ll bring it to iOS. And while we’re in the spirit of getting your photos looking just right, we’ve rounded up a few handy editing tips.
Compare looks
As you scroll and select looks, long press on the image to see the original. After selecting a look, tap the look thumbnail again to adjust the strength.

Quick rotate
If you need to rotate an image, you don’t even have to enter the editor. Just use the shortcut Shift+R on web. Or, in the Assistant tab of Google Photos, you may see suggested rotations for your sideways photos.

More green?
We’ve shared how you can bring out blue in the sea or sky. If you want a vivid image with lush green, push the Saturation slider to the max, and bring down the intensity of the red and blue hues by decreasing the Skin tone and Deep Blue sliders respectively.
Apply edits quickly on web
To apply the same set of edits to more than one photo, use the keyboard shortcut Ctrl+C / ⌘+C to copy the edit, or select “Copy edits” in the overflow menu next to “Done.” You can then open another photo in the editor (use arrow keys to open next/previous), then use keyboard shortcut Ctrl+V / ⌘+V, or select “Paste edits” to apply them to the shot.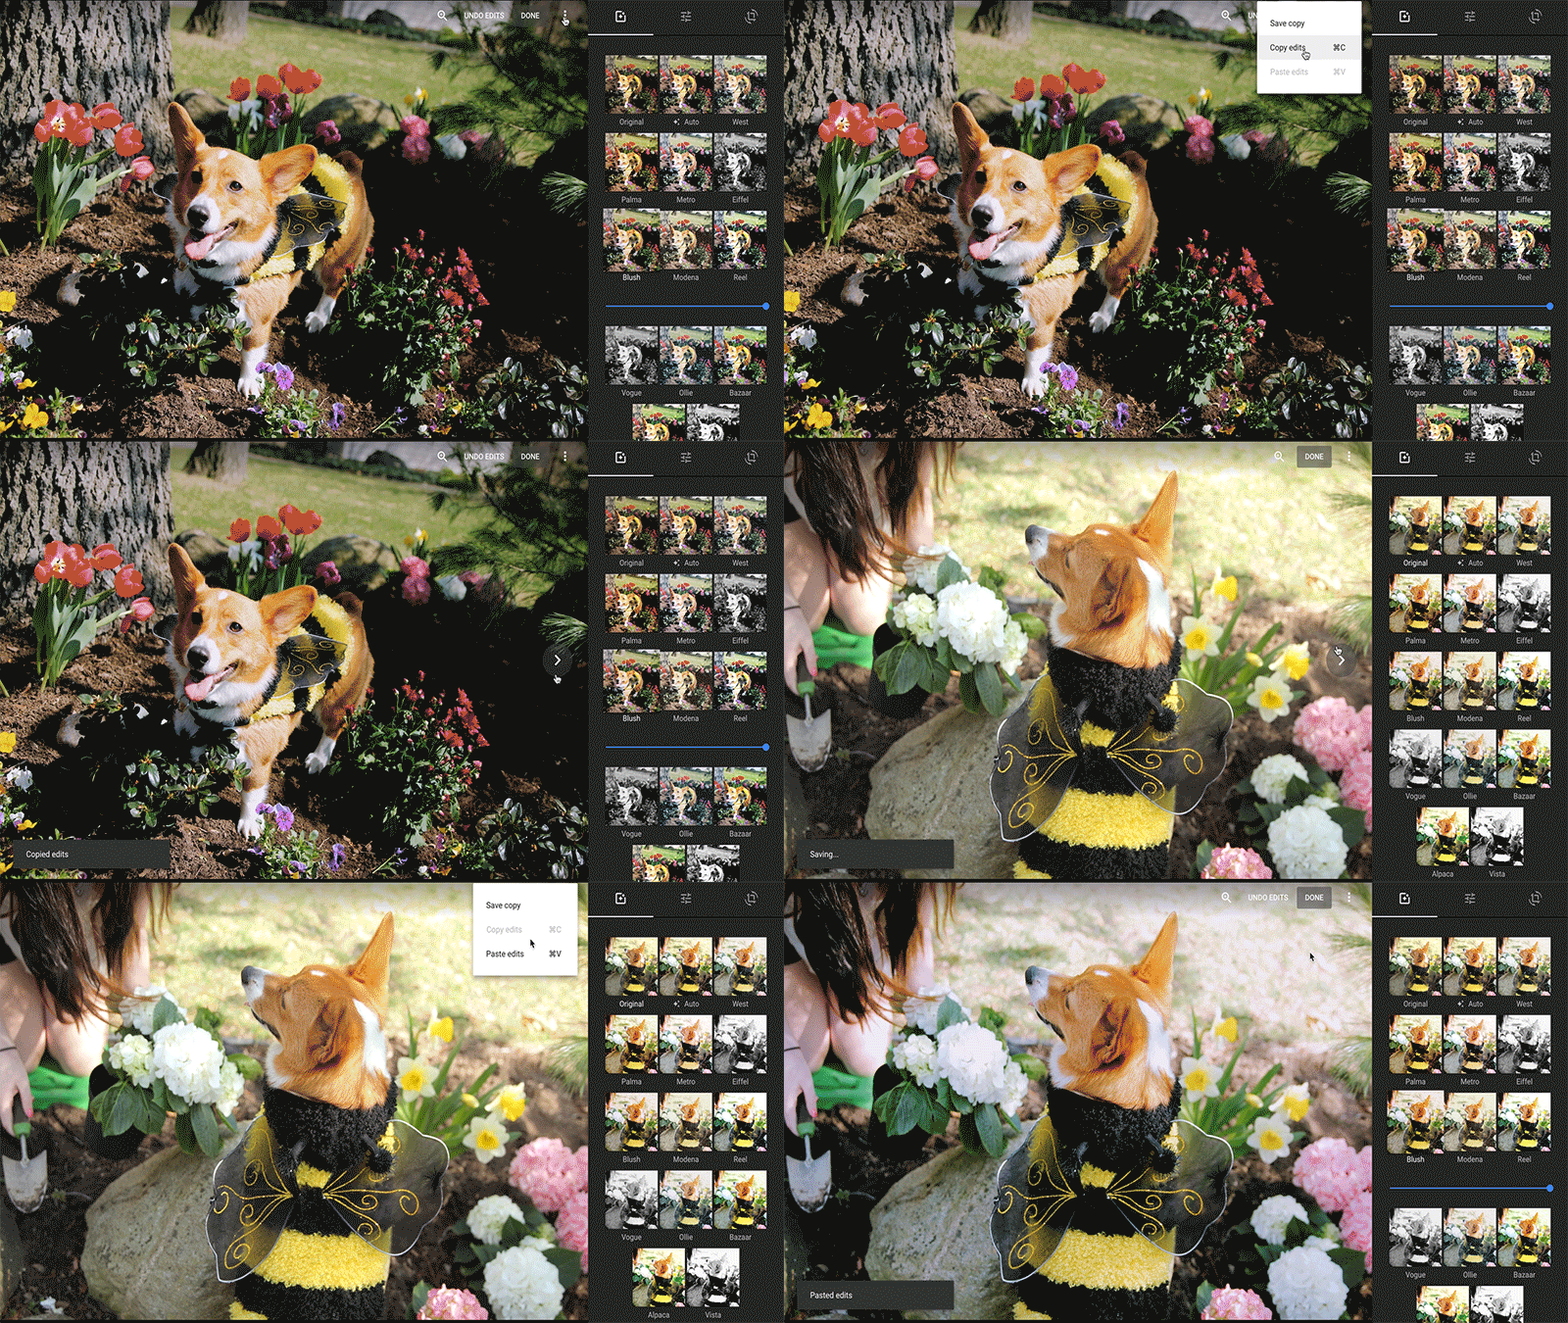
Tap “A” to apply Auto Enhance; hold “O” to see the original image without edits applied; and tap “R” to enter crop mode.
Want to keep both your edited photo and the original?
Tap the overflow menu at the top right, and select “Save copy” to create a new version.


